
Before we start putting products on the site, it is very important to create the categories in which they will be categorized.
Create categories
To create the categories in which we want to organize our products, we will follow the process below.
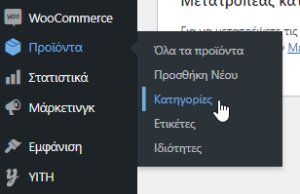
From the WordPress admin area, we go to products and select categories. There, a new window will open for us in which we can see the already existing categories and add new ones.
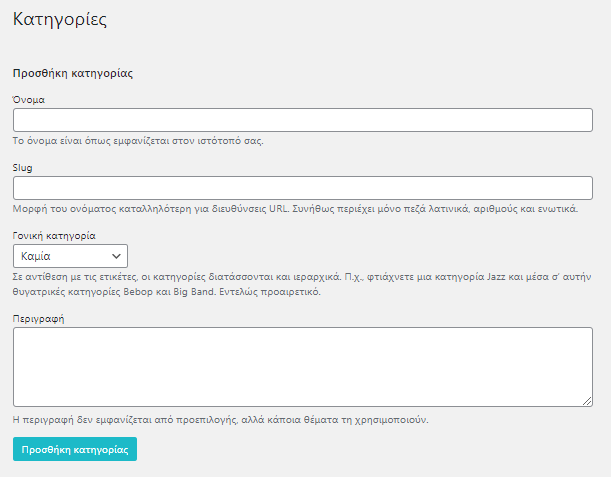
The fields we need to fill in to create a new category are:
Name
Slug (leave this blank as it is automatically filled in)
Description (optional)
Choose if we want our category to be Parent category (main) or child category/subcategory.
At this point, let’s mention that if we want one category to belong to another category, we must define the second category as the parent category of the first category.
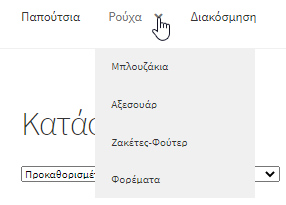
In the image below, you can see the Parent categories Shoes, Clothing and Decoration. The Parent Clothing category has as sub-categories the categories Blouses, Accessories, Jackets-Sweatshirts and Dresses.
Edit category
To edit a category, select “Edit” from the categories tab. After making the modifications we want, press update to save our changes.
Create and add categories to the Menu
To create the main Menu of your website, after creating the category tree, follow the steps below:
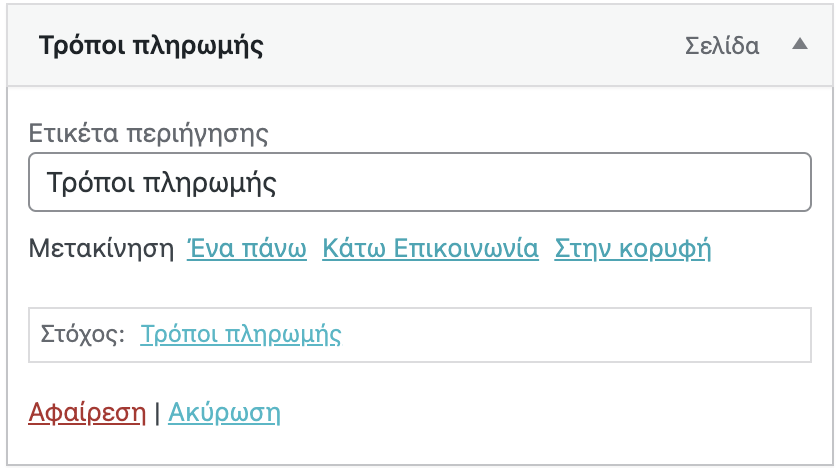
From the WordPress admin, go to the Appearance field and click on Menu.

From here you can select the ‘Main Menu‘ you want to create, then click the ‘Select‘ button.

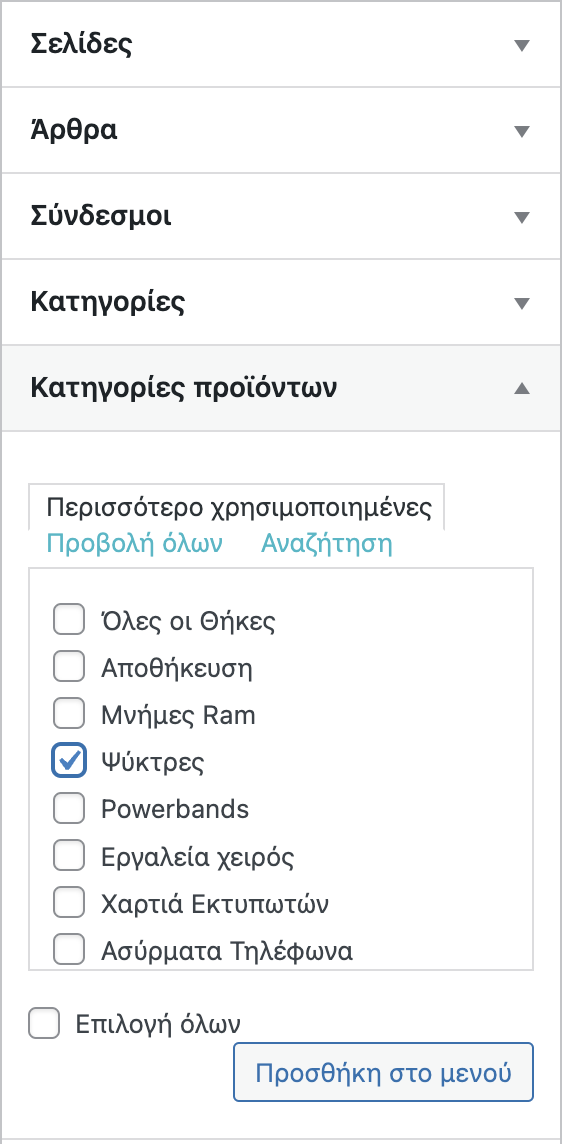
Now you can start adding categories to your menu.
You will notice on the left side that you can use pages, articles, links or categories to add to your menu. Simply select the parent categories you want to add to your menu, then click “Add to Menu”.
Once they are added to your menu, you can select and drag the items to change their order.
Subcategories
In a later stage we will see how you can add the subcategories to the Menu of your website.
To achieve this simply add your sub-categories to the menu and then click and drag the items slightly to the right under any menu category you wish to be nested.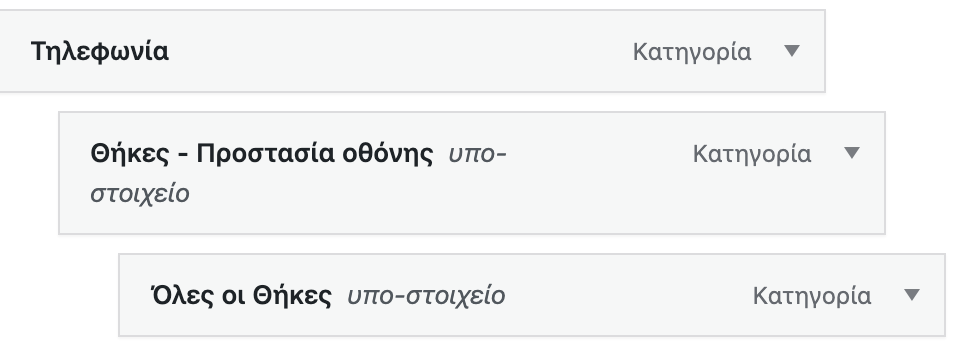
After completing the process, select “Save menu” at the bottom right so that your actions are saved and the menu appears correctly on the home page.
If you want to remove a category or sub-category from the menu, select the arrow to the right of the item you wish to delete and then press “Remove” and “Save menu“.
ΑΤΤΕΝΤΙΟΝ! The process we mentioned above concerns the categories that appear exclusively in the menu of your site. If you remove a subcategory from the menu it will not appear in the main menu of the site, however the products belonging to the subcategory and its parent category will still be displayed.
So if you want that particular subcategory not to appear at all, you will need to delete it completely from the admin area. In this case, the products belonging to the subcategory you will delete will remain uncategorized and will not appear on the site.
If you want to know more about the products click here.